Welcome to the Big Z Fabric sewing blog! In case you missed it, we’re working on a three piece winter combo – scarf, hat, and bag. If you’d like to make all three pieces, here what you will need.
Requirements for three piece winter set:
This scarf is part of our Winter Apparel combo. We used 4 types of fabric in this project which includes a hat, a scarf, and a winter bag. For these three projects we used the following Big Z Fabrics:
- Fur fabric for project https://blog.bigzfabric.com/index.php/fabrics/faux-faux-fur-fabric-long-pile/faux-fake-fur-arctic-alaskan-husky-long-pile-fabric/faux-fake-fur-arctic-alaskan-husky-long-pile-fabric-gray-sold-by-the-yard.html
- Vinyl Fabric for project https://blog.bigzfabric.com/index.php/fabrics/faux-fake-leather-vinyl-fabric/vinyl-faux-fake-leather-pleather-grain-champion-pvc-fabric/vinyl-faux-fake-leather-pleather-grain-champion-pvc-fabric-chocolate-sold-by-the-yard.html
- Canvas for project: https://blog.bigzfabric.com/index.php/solid-cotton-duck-canvas-fabric-dark-brown-sold-by-the-yard.html
- Fleece for project https://blog.bigzfabric.com/index.php/fleece-printed-fabric-scott-checkered-color-7-sold-by-the-yard.html
DIY WINTER APPAREL NEEDS
- 1 yard 54-60” wide fake fur – I chose Faux Fake Fur Arctic Alaskan Husky Long Pile Fabric / Gray .
- 1 yard pleather – I chose DuroLast™ Vinyl Faux Fake Leather Pleather Grain Champion PVC Fabric / Chocolate.
- 1 yard 54-60” wide fleece – I chose Fleece Printed Fabric / Scott Checkered Color #7. This plaid really coordinates with my fur and my pleather
- 1 yard lining – I like to use duck or canvas for stability, but you can also use a quilting cotton. I chose Solid Cotton Duck Canvas Fabric / Dark Brown.
- Scissors or a rotary cutter and mat
- Measuring tape or ruler
- Thread
- Sewing machine
DIY WINTER HAT SPECS AND NEEDS
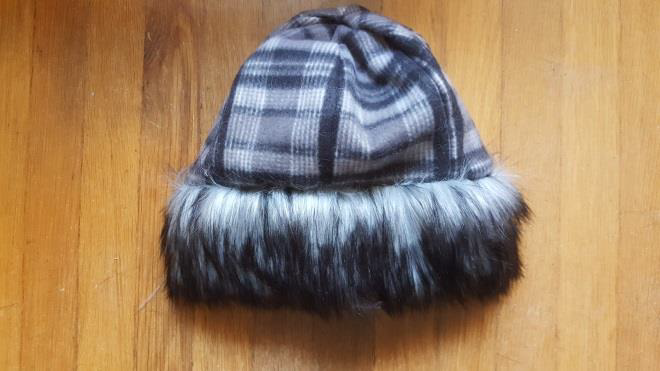
Today we’ll be tackling part two of our three piece winter combo – the hat! The crown of the hat is made with fleece while the brim is made of faux fur. You’ll need to do some measuring and pattern creation before you start, but I’ll walk you through the whole thing.Requirements:
- ¼ yard of fur (9” by width of fabric)
- ¼ yard of fleece (9” by width of fabric)
- Scissors
- Thread
- Sewing machine or needle and thread
NOTE: You can pre-wash the fleece if you’d like, but I don’t recommend washing the fur. You can spot clean as necessary.
NOTES ON CUTTING FUR:
Faux fur should be cut in a single layer from the wrong side. Lay your fabric flat. Use a felt tip pen to draw your cutting lines. Then you can either use a sharp knife (like an Xacto blade) or slide your scissors UNDER the fur so that you are only cutting the backing. This way, you minimize the mess and maximize the amount of fur on your project.
Step 1: Do the math!
If you want to tuck your hair up, do it before you measure as it will affect how the hat fits. Once your hair is ready, measure around your head where you want the hat to sit.
It will probably be somewhere around 22-25”. Next, measure from the front of your head to the back where you want the hat to sit.
Take the measurement from around your head and divide it by 6. Add 1” for the seams. This will be the width of your pattern piece.
Using the measurement from over your head, divide it in half and add 1”. This will be the height of your pattern piece.
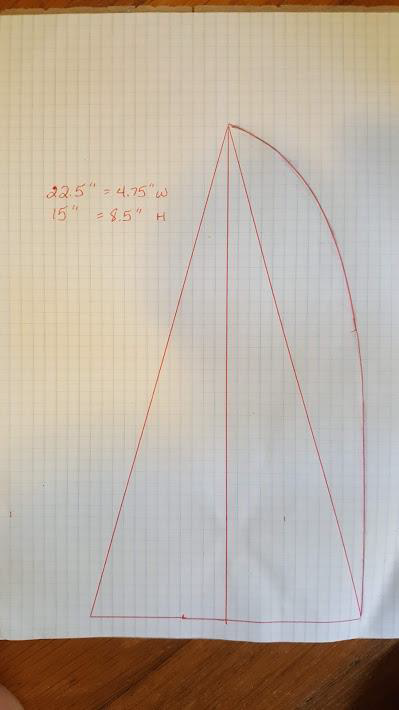
So for my head, I ended up with a width of 4.75” and a height of 8.5”. These are the only two measurements you will need.
Step 2: Draw the pattern pieces
Your main pattern piece will be a triangular shape. The base of the triangle is the width, and the height of the triangle is the height measurement. So, draw a horizontal line at the bottom of a piece of paper the same as the width of your pattern piece. Find the center of the line and draw a vertical line the same as your height measurement. Attach the two ends of the horizontal line to the top of the vertical line. It should look something like this:

Your head is, of course, not pointed, so you want to curve the lines a bit. Draw two curved lines outside the triangle something like this: Make sure that you don’t alter the width of the pattern piece at the bottom.
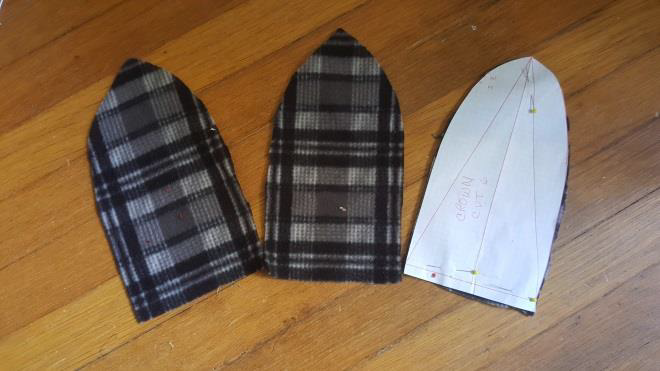
Step 3: Cut the fabric
You will need to cut six of the triangular pieces from your fleece. These will make up the crown of your hat.
You will also need to cut one piece of faux fur 6” wide and as long as your original measurement plus 1”. This will become the brim.
Step 4: Sew the crown of the hat
Put two of your fleece pieces right side together and stitch a ½” seam down one of the curved sides. Open them up and lay them right sides up. Place another fleece piece on top of your finished piece, right sides together, matching one of the curved edges. Sew that curved edge in a ½” seam. Open the piece up.
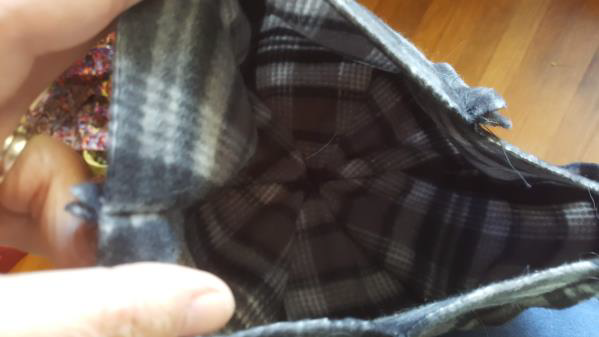
Follow the same process with the remaining three pieces. You should have two shapes that are a bit curved. Lay one piece on top of the other, right sides together. You are going to stitch one long seam across the top curved edge using a ½” seam allowance. When finished and opened up, your crown should look like a bowl or <gasp> the crown of a hat!
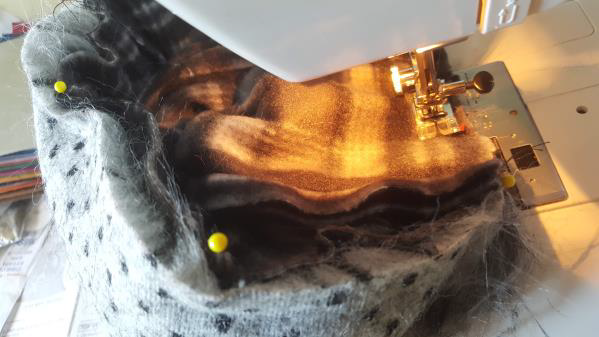
Step 5: Adding the brim
Lay the crown aside and pick up the piece of faux fur. Put the two short ends right sides together and stitch a ½” seam. It should be the same measurement around as the crown of your hat. Pin the brim to the crown right sides together matching the raw edges. Stitch in a ½” seam all the way around. Don’t forget to pick out any fur that may have been caught in the seams. I slide an awl under the fur a few strands at a time and it slides right out of the seam.
Step 6: Finishing touches
Turn the raw edge of your brim under ½” and fold the brim in half. Pin the folded edge over the seam allowance where the brim meets the crown. Hand stitch in place hiding the seam allowance. You can turn the brim up or leave it down, whichever you prefer.
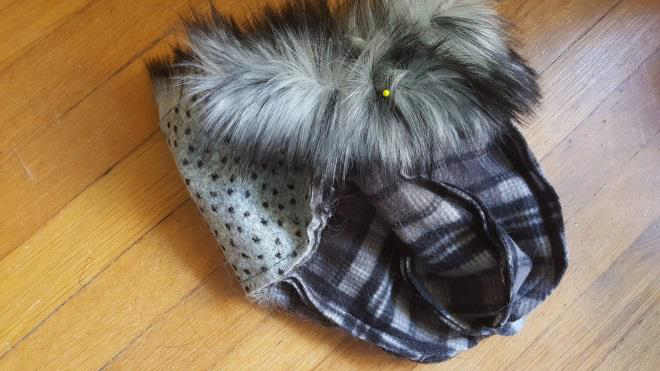
If you’d like to add a fur pompom, cut a circle of fur 4” across. Run a gathering stitch around the edge and pull it tight. Stitch to the top of the crown where all the seams meet. Or, you can leave it sleek and chic as I did. This will keep you toasty warm this winter!